 I live near quite a few bagel shops, many of which I have tried and loved, but buying fresh bagels all the time can get a bit expensive. Plus, I’ve had some requests for homemade bagels, so I decided to give it a try.
If you decide to make these bagels, I think you should be warned that it is quite an involved process that will take at least a full day, but more likely a day and a half. That being said, these homemade bagels are quite delicious, easily frozen, and much cheaper than buying from a bagel shop. In other words, I would highly recommend making these. Plus, with my step-by-step tutorial, you shouldn’t have any difficulty.
Cinnamon Raisin Bagels
Ingredients:
Sponge
1 teaspoon instant yeast
4 cups flour (preferably bread flour)
2 1/2 cups water, room temperature (about 80F)
Dough
1 teaspoon instant yeast
3 3/4 cups flour (preferably bread flour)
1 tablespoon ground cinnamon
5 tablespoons sugar
2 3/4 teaspoons salt
2 teaspoons malt powder or 1 tablespoon dark or light malt syrup, honey, or brown sugar
2 cups loosely packed raisins, rinsed with warm water to remove surfact sugar, acid, and natural wild yeast
To Finish
1 tablespoon baking soda
Cornmeal or semolina flour for dusting
Melted butter for brushing (optional)
Cinnamon sugar for sprinkling (optional)
Directions:
For the Sponge:
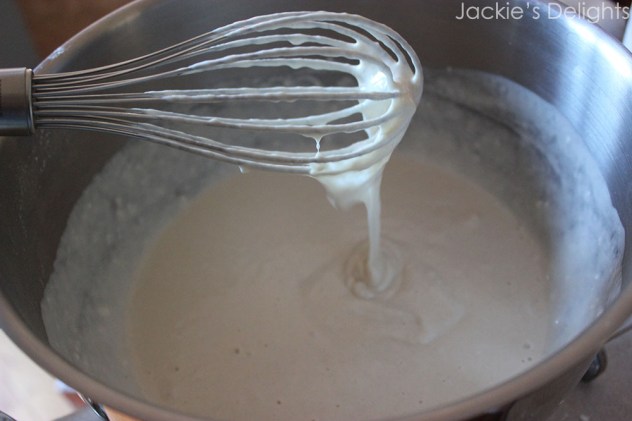
Stir together the yeast, flour and water. 
Continue mixing until the batter is smooth. Cover with plastic wrap and allow to rise for about two hours.
The mixture should double in size and be bubbly and foamy.
For the dough:
Stir in the extra yeast, then add three cups of flour, cinnamon, sugar, salt and malt. Work in the last 3/4 cup of flour slowly, and towards the end add in the raisins. Knead the dough on the counter for about 10 minutes, until firm. If the dough still feels very stick, you may want to add in some extra flour. If the dough rips and seems to dry, add a couple drops of water.
Once you’re done kneading, divide the dough into 12 to 24 pieces, depending on how big you want your bagels. Cover with a damp towel and leave to rise for about 20 minutes.
Note: if you accidentally leave your bagels to rise for too long, they will all morph into one large lump. If this happens, don’t freak out: just knead and divide it again and your dough will be saved! 
Line a baking sheet or two with parchment paper and spray it with oil. You will now create the holes in your bagels, carefully stretching the dough out. Spray the tops of the bagels with oil, cover with plastic wrap, and allow to sit at room temp for another 20 minutes.
After the 20 minutes, fill a small bowl with water. You’ll know your bagels are ready if they float in the water within 10 seconds (do this test on just one bagel). If they don’t, then let them sit at room temp for a bit longer. If they do float, they’re ready to be retarded in the fridge. They need to be in the fridge for at least four hours or up to two days.
To Finish
Preheat your oven to 500F. While that’s warming up, boil a large pot of water. When the water starts boiling, add the baking soda. Each bagel will be boiled, one to two minutes on each side. Don’t stack your bagels, only place as many as can comfortably fit.
While the bagels are boiling, prepare your baking sheets with parchment paper (you can reuse the same paper from when you placed the bagels in the fridge). Be sure that the parchment paper is lightly sprayed with oil, and sprinkle either cornmeal or semolina flour.
When it’s time to take the bagels out of the boiling water, use a skimmer or slotted spoon to make sure no excess water is carried onto the pan (if the bagel isn’t dry enough, it will become soggy after being baked). If you want to top the bagels with cinnamon and sugar, this is the time to do it.
It’s finally time to bake these, so place them in the oven for 5 minutes. After that, turn the oven temp down to 450F and give the pans a full 180 degree rotation. Bake for another 5 minutes or until golden brown.
If you want, you can brush the tops with butter and cinnamon sugar. Otherwise allow another 15 minutes to cool down. Best when eaten fresh.
Adapted from the smitten kitchen, original source: The Baker’s Apprentice


Leave a Reply